Game Maker 7.0
Introduction
Tutorials
Other Documents
![]()

Breakout
5 Scoring & Lives
Section Menu
Breakout Home | 1 | 2 | 3 | 4 | 5 | 6
So far, you should have something that you can sort of play. After a few minutes though the fun trickles away. What's the point? Having a score and doing something when the tiles have all been removed gives the game a sense of purpose. Now we are giving the player something to aim for.
Start by creating an object called, obj_game_controller. Don't attach a sprite to this object. Also, click on the checkbox marked persistent. This means that the score and lives can be used in the extra levels we will make later.
Add a Create event. This is what happens when the object is first loaded into the game. All we need to do here is set the score to 0 and choose the number of lives. Both items are found in the Score tab. You should end up with something like this,
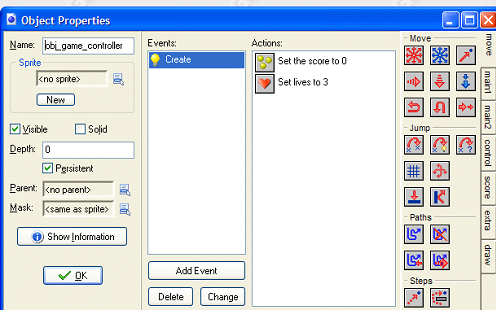
You can make the game have as many lives as you need. The game will be more interesting to play if you start with 3 lives and give the player some way of earning more lives in the game - perhaps when they finish a level.
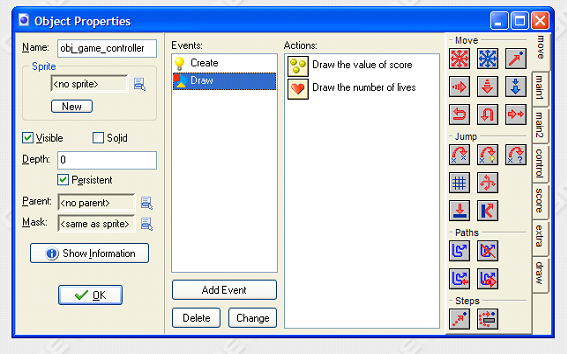
Now we need to get the score and lives displayed on the screen. Add a Draw event and choose the icons shown in the screenshot. The score is drawn at x = 0, y = 0 and the lives are drawn at x = 128, y = 0. Experiment with different values if you want but that seems to work fine.
Go back to the window for the room. Add exactly one instance of the object to the room. Save your work and test that the score is displayed. You should see the score and number of lives but they won't change yet.
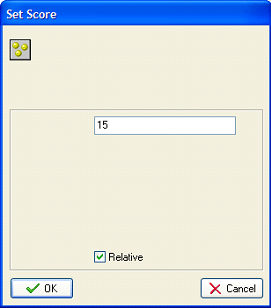
The score changes when you hit the tiles. Our actions for this event were in the tile object. We need to open up the obj_tile_blue window again. Go to the collision event that you created earlier. Drag the Set Score icon into the actions window and fill in the pop-up as shown in the screenshot.
Save and check that the score increases when you hit the tiles.
Now to turn our attention to the lives. The player loses a life when the ball goes off the bottom edge of the screen. This event was handled in the ball object when we made the ball bounce up the screen. Open up this window and click on the Outside Room event that you created earlier. The bit we want to change is highlighted in the screenshot below.
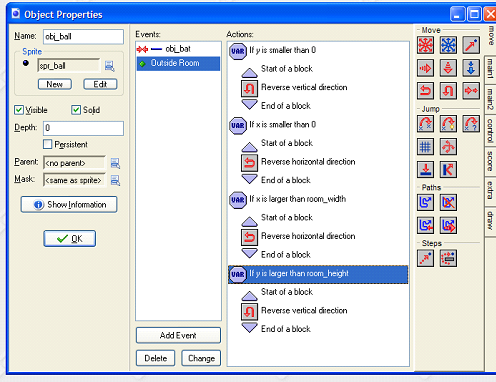
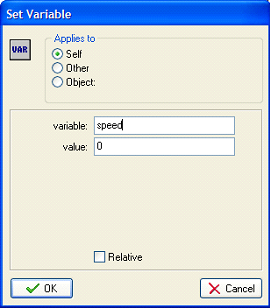
Start by deleting the Reverse Vertical Direction action. We need to replace it with some new actions. First, stop the ball moving by changing its speed. Drag in a Set Variable icon and fill in its pop-up as shown below.
Next we stick the ball to the bat again. Drag in another Set Variable icon and fill in its pop-up as shown.
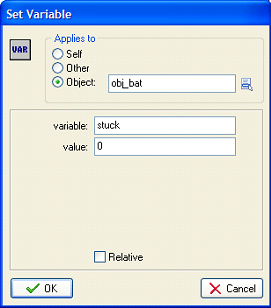
The stuck variable belongs to the bat object. Make sure the top part of the window is filled in correctly.
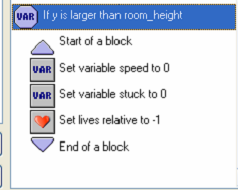
When the player loses a life, the ball should be back on the bat ready for a restart (if there are more lives left).
Our last job here is to reduce the number of remaining lives by 1. Drag in a Set Lives icon form the score tab and choose the settings shown.

The Relative box means that we will be reducing the number of lives by 1 each time a life is lost.
Test again, my friend.
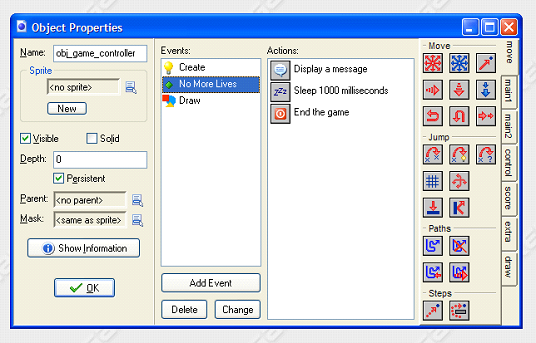
OK, so the score changes and you can now lose lives if you drop the ball. The game still isn't there yet. The game should stop when the player runs out of lives. We'll keep this fairly simple - tell them it's over, wait a few seconds and stop the game. To do this we need to add another event to the obj_game_controller. This time, add a No More Lives event (found under Other).
Go to the Main2 tab and drag in a Display Message icon. Write something that lets the player know that their game is over.
Drag in a Sleep icon and get the computer to sleep for 2000 milliseconds.
Drag in an End Game icon. Your screen should look like this.
Test your game and make sure you lose all those lives.
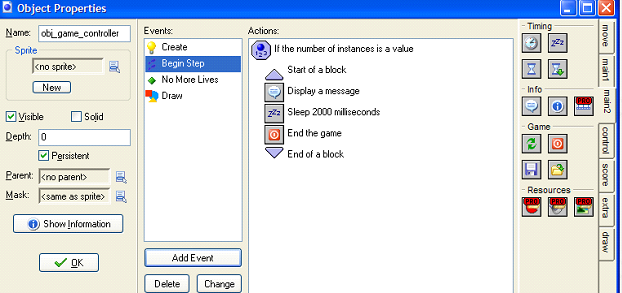
The final step to making this a real game is to check whether all of the tiles have been removed. We do this in the obj_game_controller. Add a Begin Step event.
If there are no tiles left, the player has finished the level. For now we'lljust end the game telling them they have won. We can change this later on when we have designed more levels.
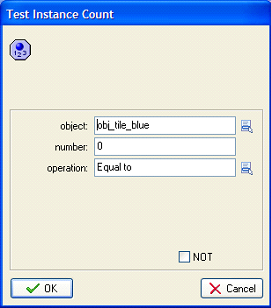
Drag in the Test Instance Count icon from the Control tab. We need to check if there are no instances of obj_tile_blue left in the room. Fill in the pop-up as shown.
Next drag in a Start Block icon - an up arrow like you used when you were making the ball bounce on the edge of the screen.
Drag in a Display Message icon and tell the player that they have beaten the game.
Drag in a Sleep icon and set the timer for 2000 milliseconds.
Drag in the End Game icon and round your actions off with an End Block icon. Your screen looks like the screenshot.
Save everything and test your game again. Knock out all of the tiles and check that the game ends as it should.