Raspberry Pi Pico
MicroPython - Basics
MicroPython - More Involved
MicroPython - Pico W
MicroPython - micro:bit
MicroPython - Projects
CircuitPython - Some Basics
CircuitPython - HID Adventures
CircuitPython - Experiments
Other Pages
![]()


Raspberry Pi Pico
Neopixels
Neopixels is the name used by the electronics company Adafruit for a type of RGB LED that they package in different ways. You might also find them by their other name, 'WS2812'. Their guide to neopixels can be found here. The products they make, sell and distribute are all really good.
The point with neopixels is that they have the RGB LEDs and controller all in the same package. There is no need for resistors and, other than power and ground, you only need to use one digital pin to control a whole series of neopixels. They are very bright, easy to connect and, with the right library, easy to control.
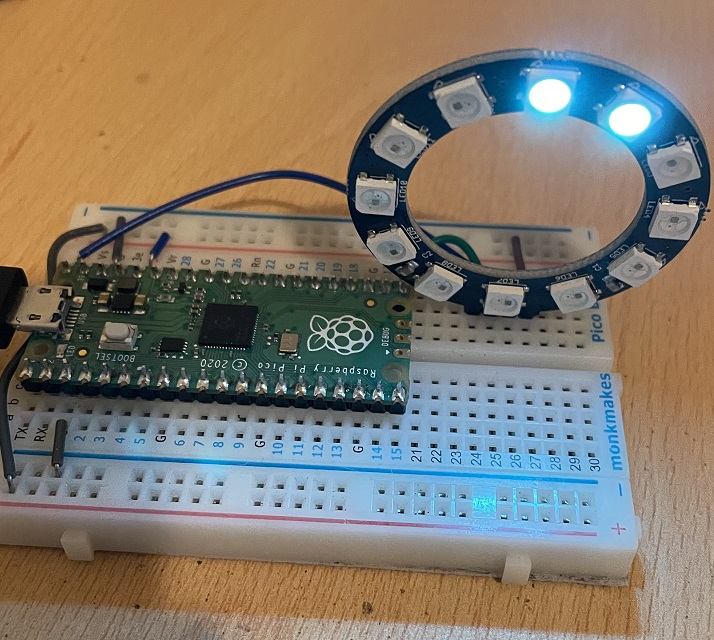
They come in all shapes and sizes. The photograph shows a Kitronik breakout board of 12 neopixels. Kitronik refer to them as 'zip' LEDs.
I have put them in the 'Basics' section because, at the simplest level, they are really easy to use. They are in the CircuitPython section because, at the time of writing, there is no built-in library for MicroPython. My current 'rule' is, with very few exceptions, to use CircuitPython when I need a third party library and MicroPython when I'm going to write that library myself.
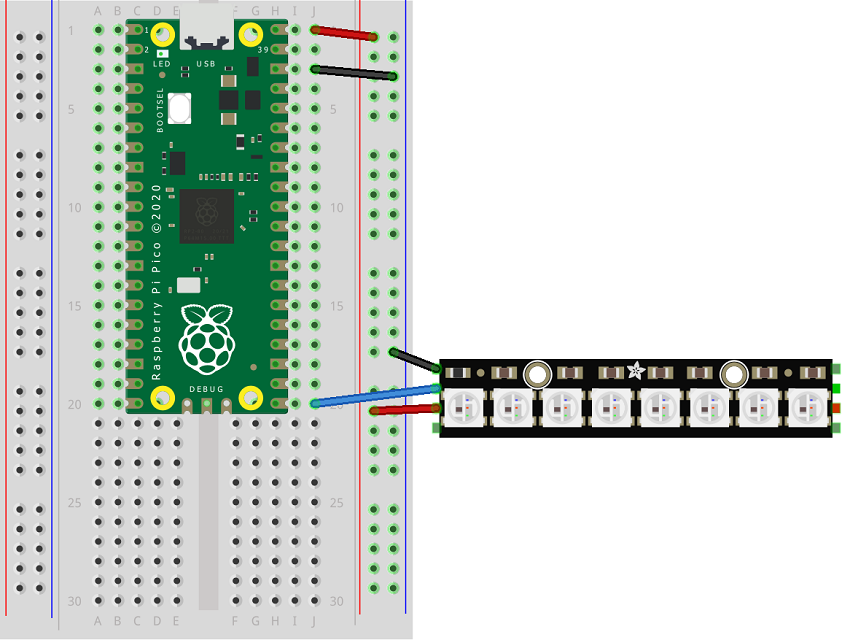
When connecting neopixels to a controller, we need to be careful. They can draw a lot of power. 12 neopixels at lowish brightness is fine to run from the Pico. Neopixels prefer 5V though. So connect the VBUS pin to the VCC or 5V connector of the neopixels. You can also use a separate power supply as long as you keep it to 5V (if using a plug-in power supply) or 4.5V if using AA batteries. When you use a separate power supply, make sure to connect the GND of that supply to the GND of your microcontroller.
The Fritzing diagram shows the principle with a Neopixel stick of 8 pixels. The main things to note are that you use VBUS for power and that you connect one pin to the DATA IN. These sticks are chainable. The green square on the opposite side is the DATA OUT pin. You can feed this and the power pins to the power and DATA IN pins of another set of neopixels.
You need a library for this - get the latest .mpy one from here,
Whenever I connect neopixels, I start with a simple sketch to make sure that I have the settings right for the neopixels I am using. There are some minor differences, mainly to do with the order of the colours. Make a few changes to this to get started,
- pixel_pin to the pin you have used.
- num_pixels to the number of pixels you have in your circuit.
- ORDER start as you see here and be prepared to change this if necessary.
This program should light up all of your pixels red. Make the changes needed if that doesn't happen, whether that is your connection or one of the parts of the program mentioned above.
import board
import neopixel

pixel_pin = board.GP16
num_pixels = 12
ORDER = neopixel.GRB

pixels = neopixel.NeoPixel(pixel_pin, num_pixels, brightness=0.2, auto_write=False, pixel_order=ORDER)

off = (0, 0, 0)

pixels.fill((255,0,0))
pixels.show()
In the next program, I wanted to light and unlight the pixels with a random colour. One of things that is most fun to do with Neopixels is to animate them.
from time import sleep
import board
import neopixel
from random import randint

def wax_on(rgb, delay):
    for i in range(num_pixels):
        pixels[i] = rgb
        pixels.show()
        sleep(delay)

def wax_off(rgb, delay):
    for i in range(num_pixels-1, -1, -1):
        pixels[i] = rgb
        pixels.show()
        sleep(delay)

pixel_pin = board.GP16
num_pixels = 12
ORDER = neopixel.GRB
pixels = neopixel.NeoPixel(pixel_pin, num_pixels, brightness=0.2, auto_write=False, pixel_order=ORDER)

off = (0, 0, 0)

pixels.fill((255,0,0))
pixels.show()

while True:
    colour = (randint(0,255),randint(0,255), randint(0,255))
    wax_on(colour, 0.1)
    sleep(0.5)
    wax_off(off, 0.1)
    sleep(0.5)
This last one shows how to automatically use a rainbow pattern on your neopixels and one way to cycle colours around your pixels. I have done this by making a list containing the index of each pixel. I then use slices to periodically rotate the pixels by 1. You could do -1 in that line to rotate them the other way. You can also change the delays from 0 to another time value and muck around with the brightness.
from time import sleep
import board
import neopixel
import math


def hsv_to_rgb(h, s, v):
    if s == 0.0:
        return (v, v, v)
    i = int(h*6.0) # XXX assume int() truncates!
    f = (h*6.0) - i
    p = v*(1.0 - s)
    q = v*(1.0 - s*f)
    t = v*(1.0 - s*(1.0-f))
    i = i%6
    if i == 0:
        return (v, t, p)
    if i == 1:
        return (q, v, p)
    if i == 2:
        return (p, v, t)
    if i == 3:
        return (p, q, v)
    if i == 4:
        return (t, p, v)
    if i == 5:
        return (v, p, q)

def make_colour(h):
    hsv = hsv_to_rgb(h,1,0.5)
    r,g,b = hsv
    return (math.floor(r*255),math.floor(g*255),math.floor(b*255))

def rainbow(delay, ps):
    for i, p in enumerate(ps):
        pixels[p] = make_colour(i/num_pixels)
        pixels.show()
        sleep(delay)

pixel_pin = board.GP16
num_pixels = 12
ORDER = neopixel.GRB
pixels = neopixel.NeoPixel(pixel_pin, num_pixels, brightness=0.2, auto_write=False, pixel_order=ORDER)

pix_indices = [i for i in range(num_pixels)]
rainbow(0, pix_indices)

while True:
    pix_indices = pix_indices[1:] + pix_indices[:1]
    rainbow(0, pix_indices)
    sleep(0.1)