Other
Arduino - LED Projects
Arduino - Buzzer Projects
Arduino - Midi Projects
Arduino - Microview
Arduino - Other Projects
Arduino - Visual Basic.NET
Arduino - Tim's Projects
Arduino - Links
![]()


Bi-Colour LED 2
Introduction
On the previous page, we saw the 3-pin common cathode bi-colour LED. This page looks at the 2-pin version. There are a few differences in addition to the absence of the cathode pin.
You Will Need
- 1 x 330 Ohm Resistor
- 1 x Bi-Colour LED (2 pin)
- Jumper Wires
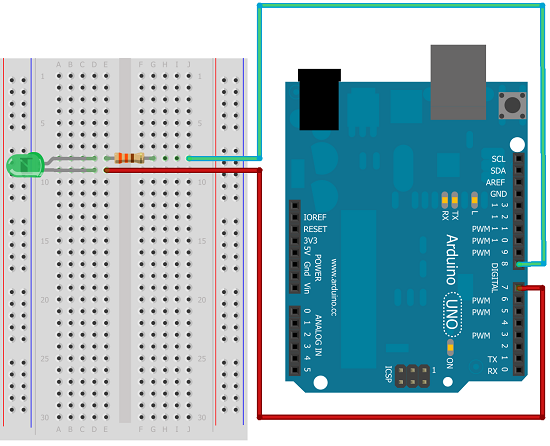
Making The Circuit
The LED I am using is a red/green LED where the green pin is the longer of the 2 pins.
Programming The Arduino
The way that we program this type of LED is to connect both pins to digital pins on the Arduino. By driving one of the pins high and one low, we can determine which colour is lit on the LED. If we alternate between the LEDs quickly enough, it will appear as though they are both on at the same time and there will be a blend of the two colours. If we turn both digital pins low, neither of the LEDs is on.
const int green = 7;

const int red = 8;


void setup()

{

  pinMode(red, OUTPUT);

  pinMode(green, OUTPUT);


}


void loop()

{

  // red on

  digitalWrite(red, HIGH);

  digitalWrite(green, LOW);

  delay(500);

  // green on

  digitalWrite(red, LOW);

  digitalWrite(green, HIGH);

  delay(500);

  // both off

  digitalWrite(red, LOW);

  digitalWrite(green, LOW);

  delay(500);

}
Alternative Wiring
As with the 3-pin LED, we can use a NOT gate to reduce the number of Arduino pins required to run the LED.
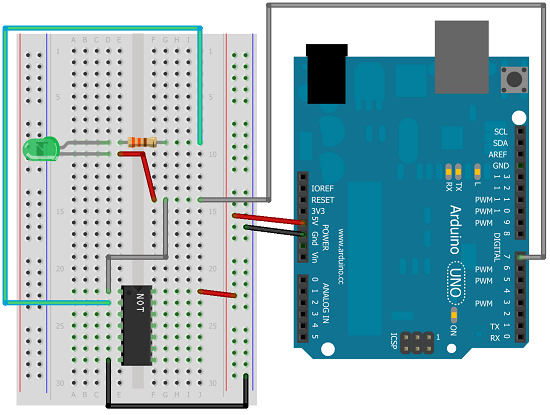
The NOT gate means that one of the LED pins is always driven high whilst the other is driven low. Unlike with the 3-pin LED, we can't simply change the pin to an input pin to turn both of the LEDs off. The NOT IC always carries enough voltage to dimly light the LED. One way around this is to use the voltage drop across signal diodes to achieve the same effect as we did on the page on Tri-State logic.
const int led = 8;


void setup()

{

  pinMode(led, OUTPUT);

}


void loop()

{

  //red on

  digitalWrite(led, HIGH);

  delay(500);

  // green on

  digitalWrite(led, LOW);

  delay(500);

}
Challenges
With a handful of these LEDs, there is scope to make some very interesting lighting displays. It's worth having a play with half a dozen or more of them in a circuit to see what can be done.